Hello everyone! Anna-Karin here with a tutorial for a mixed media board, using this week's 'Into the Woods' challenge theme as inspiration.
I am a real forest person and forests are my favourite natural setting, if I could, I would walk or cycle in a forest every day. I wanted to do a board for my study which celebrates the beauty of forests, so that I can look up from my desk and find myself among the trees in a forest. I used a fun technique with plastic wrap and Distress Paints for the background, which gives awesome texture. I am also going to show some other techniques you can use to add texture to a project. It is a long tutorial, so let's start.
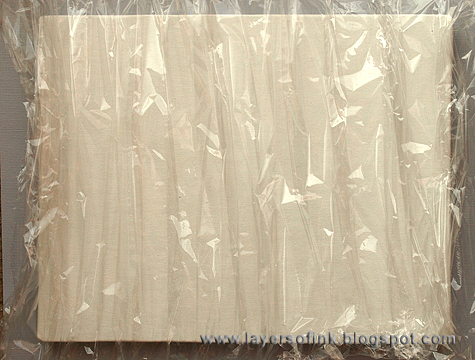
I used a mixed media board (8 x 10 in), but you could use watercolour paper or a canvas too, just place a book under the centre as support. Start by preparing a fairly large piece of plastic wrap by pulling it to form pleats or lines. Because of the forest theme, I wanted lines rather than completely random texture. You want to have this ready before the next step.
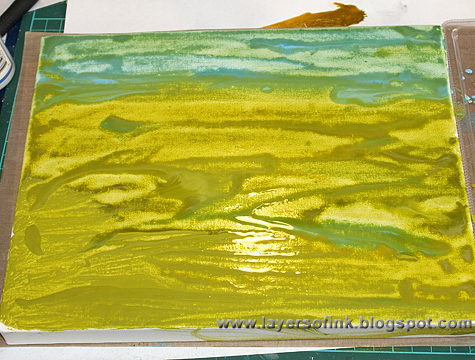
On a palette (I like to recycle plastic packaging for this), pour out a little pool of Peeled Paint and Salty Ocean Distress Paint, and a little bit of Adirondack Lettuce, or another lighter shade of green Distress Paint. You could add some yellow too if you want to. Add quite a lot of water to each pool of paint, you want the paint to be watery for the technique to work well. I used a Ranger Pipette to add the water, because it gives great control. Working quickly, start painting the green paints on the lower two-thirds of the board, using a paint brush. Dab the brush on a paper towel, but don't clean it, and quickly paint Salty Ocean at the top. The green that remains in the paint brush mixes with the blue to create a really nice colour and it also makes the colours blend better. Add a bit of blue paint here and there into the green too.
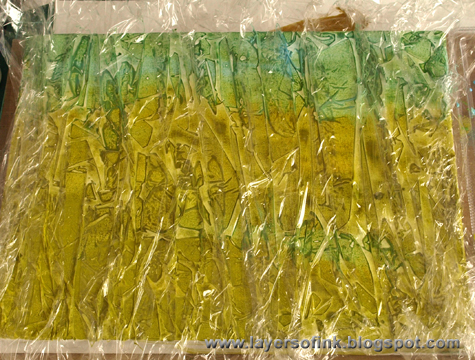
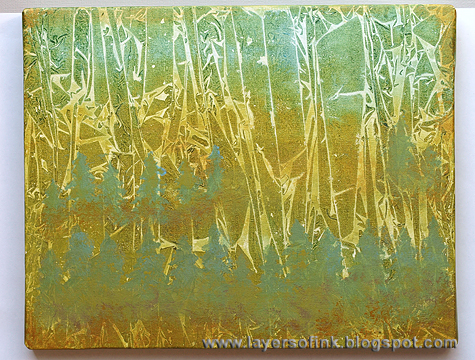
Immediately place the plastic wrap on top. If the paint has already started to dry, the technique won't work, so you got to be quick. Place a book on top and leave to dry completely. Don't peek! Check at a corner, if it isn't dry yet, leave it. If you remove the plastic wrap before the paint is dry, you don't get the same texture. This is the hard part, I am always tempted to peek.
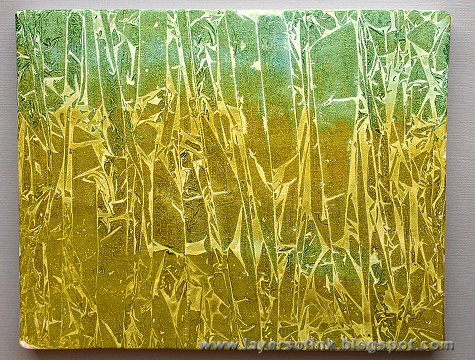
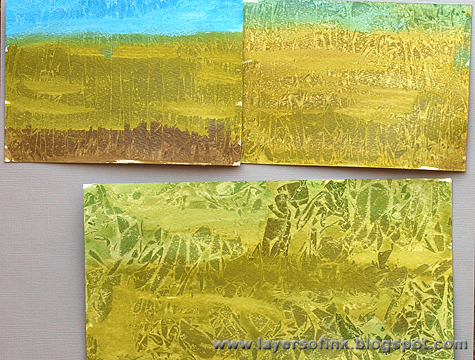
When the paint is dry, you will have this gorgeous texture. It will be different every time and I like techniques that give unpredictable results, since you never know what you are going to get. This technique works really well with Distress Paint, since they are pretty fluid.
Here are a few other examples. On the paper to the top left, I didn't add enough water to the paint, so they haven't blended nicely and there isn't a lot of texture since the paint had already started to dry before the plastic wrap was placed on top. On the paper to the top right, I wrinkled the plastic wrap a lot, creating a finer texture. On the paper at the bottom, I wrinkled the plastic wrap into a ball, unfolded it and placed on the paper, creating a different type of texture.
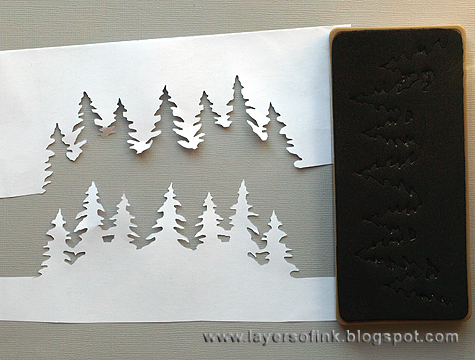
I wanted to add some trees to the background and die cut the Tree Line from Eclipse Tape, to create my own stencil/mask. To see more ideas of how to use your dies to make your own stencils, check out this tutorial of mine. Eclipse tape works great for this since it is self-adhesive and repositionable, but you could also use printer paper or a piece of acetate.
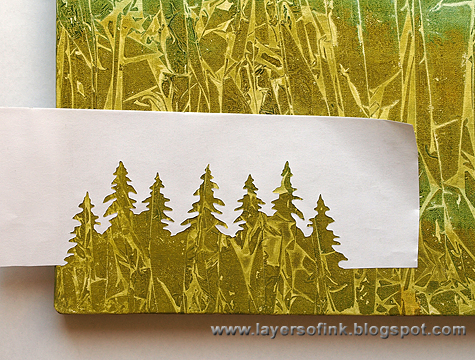
Place your stencil on the board where you would like to add some trees.
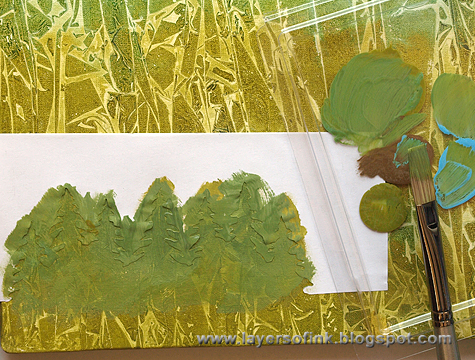
Mix Peeled Paint, Salty Ocean and a little bit of Walnut Stain Distress Paint, or use a colour such as Forest Moss. Paint your trees. Continue to add more trees. When the paint is dry, you can add more texture by dry-brushing a little paint on the trees.
I did a full row at the base, and added some trees further into the board too. I liked how they blended in with the background, if you want your trees to stand out more, use a darker green colour.
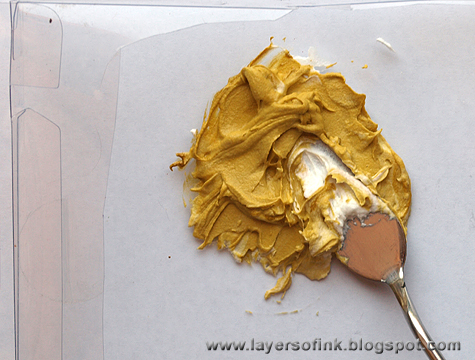
I love texture, and wanted to use stencils and paste too. Since I did not yet have Wendy Vecchi's Metallic Gold Embossing Paste when I made this, I mixed a little bit of Tarnished Brass into white paste. You don't want to add too much, because then the paste will be too fluid. If you have the gold embossing paste, use that instead, it is a fabulous golden paste.
I made my own stencil with the Mini Flourish die and clear packaging and used a Prima Flower stencil for the little dot flowers. Apply the paste through the stencil with a palette knife or an old plastic card.
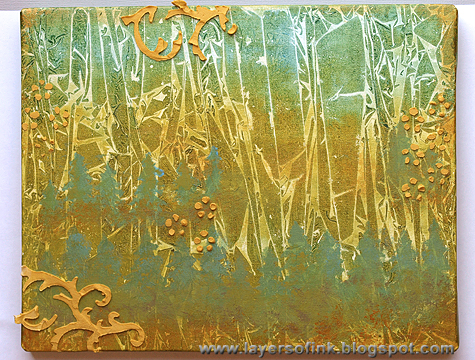
Leave to dry, when dry, I painted more Tarnished Brass on top of the paste. If you use the Metallic Gold Paste instead, you can skip this step. I also added some stamping with Archival Jet Black ink, using one of my favourite background stamps, from Tim Holtz School Desk set. I held it in my hand instead of mounting on an acrylic block for a random impression. I also painted some Tarnished Brass around the edges of the board.
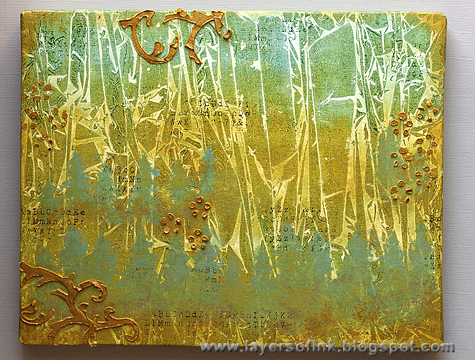
Here's a close-up of one of the flourishes.
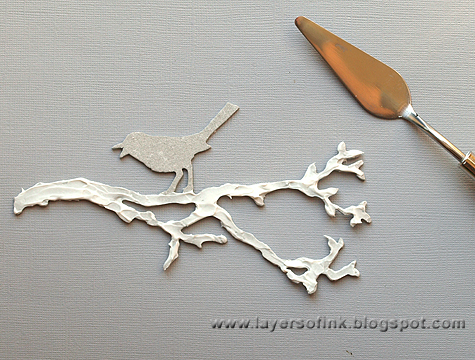
The board needed some life too, so I die cut the Sizzix Bird Branch from grungeboard and applied paste to the branches, using a palette knife. This gives great texture, and this project is all about texture.
When the paste is dry, paint the branch with Walnut Stain and Peeled Paint, adding highlights with Tarnished Brass. Paint the bird with Salty Ocean and Peeled Paint.
I wanted some moss on the branch and colorized Rock Candy dry glitter with alcohol inks (Lettuce, Meadow, Pesto). Tim Holtz shared how to do this last year, check out his post here. Apply Glossy Accents here and there on the branches and sprinkle glitter on top. Coat the bird with Glossy Accents too.
Die cut one large and two small pine trees from grungeboard and paint them with a mix of Peeled Paint, Salty Ocean, Walnut Stain and Lettuce. Dry-brush some of the darker colours on the trees after the paint has dried and add highlights with Tarnished Brass.
Stamp the trees with the same background stamp used on the background, aiming for a random impression.
Coat the trees with Glossy Accents and sprinkle just a little bit of the colorized glitter here and there.

I wanted some metal embellishments and liked the idea of using Prima's Bottle Caps, of transforming something that doesn't belong in nature, but often end up there because people throw bottle caps everywhere, into something warm and beautiful. I also used a bunch of Tim Holtz Idea-ology pieces: Game Spinners, Sprocket Gears, and a Philosophy tag. The little screw heads come from Prima. Most of the pieces were painted with Distress Paints which work fabulously on metal, smear some on your craft sheet and apply to the pieces with your finger. Two bottle caps were painted with Tarnished Brass and the other two with just a bit of Salty Ocean. Most of the game spinners were painted with Tarnished Brass, except for two which were painted with Peeled Paint and Salty Ocean. The screw heads were painted in different colours. The Philosophy Tag was painted with Peeled Paint and Salty Ocean and Black Soot was rubbed into the letters.

Here comes a fun part, embellishing the bottle caps. I made the large one into the life-giving sun, and the smaller three into trees. Glue the pieces down with Glossy Accents and add Glossy Accents inside the gears.
Time to assemble everything. Glue the trees and bottle caps to the board with Glossy Accents or hot glue. I used Game Spinners as trunks for the bottle cap trees. The trees needed a forest floor to grow from and Stampendous Gilded Mica Fragments were the perfect solution, with a beautiful natural shimmer. I applied Glossy Accents all along the base of the board and sprinkled mica flakes on top, pressing them down carefully with a piece of scrap paper.
Here's the third tree and bottle cap tree.
I made a little nest for the bird with mica flakes too.
The sun and all the rays were glued down with Glossy Accents. Love how this turned out.
I am fond of using quotes and there are quite a few beautiful quotes about forests by John Muir. I really love this one and I am happy to have it displayed on my wall now. It was stamped with Hero Arts alphabet stamps. There was some background stamping very close to the quote and I simply painted over it so that it wouldn't compete for attention.
Thank you for looking at this tutorial! I hope you enjoyed it, and don't forget to join us this week in the 'Into the Woods' challenge, for your chance to win a $50 gift voucher from Simon Says Stamp.
Happy crafting!!
Anna-Karin
Supplies:
Surfaces: Tim Holtz Idea-ology Grungeboard; mixed media paint board or canvas (8 x 10 in)
Dies: Sizzix: Bird Branch, Pine Tree, Mini Pine Tree & Holly, On the Edge Tree Line, Mini Flourish
Stamps: Stamper's Anonymous Tim Holtz: School Desk; Hero Arts: Printer's Lowercase
Ink: Archival Ink Jet Black
Alcohol ink: Adirondack: Lettuce, Meadow, Pesto
Paint: Ranger Tim Holtz Distress Paint: Peeled Paint, Walnut Stain, Antique Linen, Salty Ocean, Tarnished Brass, Black Soot; Adirondack Lettuce
Stencil: Prima: Sunrise Sunset Flower Stencil
Glitter: Ranger Distress Stickles Rock Candy Dry Glitter
Embellishments: Tim Holtz Idea-ology: Sprocket Gears, Mini Gears, Game Spinners, Philosophy Tags; Prima: Sunrise Sunset Vintage Bottle Caps, Tiny Junkyard Findings Screw Heads; Stampendous: Gilded Mica Fragments
Medium: Stamper's Anonymous Wendy Vecchi Embossing Paste: White, Metallic Gold
Adhesive: Judikins Eclipse Art Masking Tape; Ranger Glossy Accents; hot glue


a fab make...love the bottle caps..i love filling bottle caps with cogs ..i used some full of UTEE and cogs for flower centres...just cool ideas here trace x
ReplyDeleteFabulous tutorial. Really wonderful piece. X
ReplyDeleteWonderful, fantastic piece of work!
ReplyDelete~Kate~
Hi Anna-Karin, wonderful step by steps. Fantastic texture and dimension. Love the techniques and fabulous design too. Love how you used the die cut trees. Tracy x x
ReplyDeletewhat a great background technique!
ReplyDeletelove the extra texture from the embossing paste.
this ART is awesome.
Rally cool project Anna, I love it
ReplyDeleteOmg...how beautiful. The background of the mixed media board looks stunning. Love the idea using plastic wrap, also if patience is not the best part of me (:o)Brilliant step by step tutorial!
ReplyDeleteAn awesome project along with an awesome tutorial!!!! Very, very inspiring!! I sure will try this! Thank you!
ReplyDeleteHugs,
die amelie x
Fabulous tutorial! I've been trying new techniques for backgrounds that this one is amazing. Love the finished prodect. xxD
ReplyDeleteWill definitely be trying that later with the plastic wrap. Thanks for the inspiration!
ReplyDeleteFabulous tute! Love all the details, especially the all the metal and those funky rays for the sun.
ReplyDeleteThis canvas is so beautiful, I got so inspired that I had to try it today, but I didn't have any cling film home but luckily my parcel from Simons Says just arrived so I used the plastic "pillows" that protect things. Now it just have to dry for the next step.
ReplyDeleteWaw this is gorgeous!!!!!
ReplyDeletewow - what a great artwork - fantastic!!!!
ReplyDeletethis is so amazing. love going through the process in your photos
ReplyDelete-Rachel w k
rwkrafts.com
Beautiful project, Anna-Karin and really wonderful step by step. Thanks for sharing the "how to" and the product information with all of us. <3 Candy
ReplyDeleteA truly amazing piece, love all the texture you created with the paste and paints. Love the bottle caps too.
ReplyDeleteFabulous canvas! Thanks for all the tips. TFS
ReplyDeleteThis is absolutely breath taking...literally in the thin mountain air...LOL! I love every bit! You blew this challenge away! The texture is absolutely amazing. I am going to have to give this plastic wrap a go! Gorgeous work Anna Karin!
ReplyDeleteAnna - This is such an awesome mixed media project. Thank you so much for sharing!
ReplyDeletethis is beautiful and thank you so much for the step-by-step!
ReplyDeleteNice art! Like the bkgrd and textured details. Great "aging" of embellishments. THX for the tutorial. :)
ReplyDeleteAmazing!! I love all the different textures you have in your canvas and the colour pallet is fab - I am definitely going to try the cling wrap technique. You and Anita have knocked it out of the park this week. Fabulously unique pieces - truly inspiring.
ReplyDeleteCompletely and utterly fabulous, Anna-Karin! So many amazing techniques (the plastic wrap paint texture looks so cool), and beautiful effects. Love the bottle cap metal elements - brilliant! Thanks so much for sharing another of your wonderfully detailed step-by-steps.
ReplyDeleteAlison xx
This is incredible. I cannot believe how beautiful this turned out. Thank you so much for taking the time to share so many details. Very much appreciated and I love the inspiration.
ReplyDeleteWOW - Amazing tutorial, so inspirational, thanks for taking the time to share, love it!! Hugs Ann xx
ReplyDeleteWhat a beautiful project, thank you for sharing!
ReplyDeleteWow Anna-Karin! Love your great tutorial! So many amazing techniques! Stunning with the paper wrap. Really fabulous! Hugs, Sandra
ReplyDeleteThis is fabulous!! I LOVE how you did the paint and plastic wrap - I have got to try that!! Thanks for sharing your awesome forest with another forest loving gal.
ReplyDeleteAwesome step by step!!! Thanks so much for sharing your creativity!
ReplyDeleteYour project is amazing. I love the all the fabulous details!
ReplyDeleteThe paint/plastic wrap technique is on "must try soon" list!
Thanks for such a wonderful and detailed tutorial!
I am always amazed at the talent of the DT. You are all fabulous artists and I'd like to say thank-you for sharing some wonderful tutorials.
ReplyDeleteSuper duper tutorial!! All you details make a fabulous piece of wall art. I especially enjoyed seeing the mica used for the bird's nest, your use of distress paints and all the fabulous texture. Thank you Anna-Karin for all the extra time you spent in creating the tutorial!
ReplyDeleteAbsolutely stunning creation, I love this!! Thanks for the tutorial!
ReplyDeleteloved the work and loved the tutorial. your doggie in the photo is cute, too, by the way.
ReplyDelete