When dressing up, you really can’t go wrong with pearls. The same can be said for crafting projects! Whether you add pearl accents, a strand of pearl-like beads, perfect pearls, or pearlized mists - there are lots of ways to add pearl to your projects. This week, the challenge is to add pearl.
Will you stamp and pearlize with perfect pearls? Mist with glimmer mist? Use up some of those lovely self-adhesive colored pearls that you have in your treasure trove of supplies? I can’t wait to see what you come up with this week!
I (May) can't get enough of perfect pearls mists and powders, and I took this challenge as an opportunity to create a card featuring them in three different ways.
One of my favorite pearl tricks is to color a stamp with Distress Markers, then spritz with Perfect Pearls mist and stamp. This gives a gentle watercolor effect, as well as adding a pearlized shimmer to my stamped image. One of my favorite things about using perfect pearls is that in some light, it looks flat, but let the light hit it just right and you have an explosion of sparkle! For this card I also used perfect pearls mist on the background, and perfect pearls powder with perfect medium to create the chicken wire you see on the background.
Sandra Mouwen couldn't resist to add lots of pearl to her project.
Recently I bought this art journal and I wanted to make a double page with my favorite theme, Halloween. My inspiration came from a Halloween tag I made a few weeks ago with the interior of a haunted house. I started with some Dylusion ink sprays for my first layer, but soon it took a whole other direction when I covered almost everything with Gold Paint Dabber. I did a lot of die cutting with my trusty Vagabond, like on the Fence, the Branch Tree and of course the Dress Form. Like always, I enjoyed dressing it up! I spritzed some Crushed Grape Dylusions Spray over it and just had to add some Accents Pearls on it!
When Candy thinks of pearls, it conjures up a nostalgic, shabby chic feeling. She has created this vintage tag inspired by the lovely woman she has appropriately named "Pearl".
I took the theme of "pearl" literally and figuratively when creating this vintage #10 Sized Manila Tag. There are pearls in the centers of Tim Holtz' Trimmings Organza Ribbon Roses and trailing from the die cut spool of Tim Holtz' On The Edge Sewing. The buttons on the card are made to look like pearl buttons courtesy of Glossy Accents. The vintage portrait, printed onto Claudine Hellmuth's Natural Sticky Back Canvas is partially colorized using a shimmery "paint" made from Pink Gumball and Sour Apple Perfect Pearls Powders blended with a Small Sakura Waterbrush. Perfect Pearls are also randomly dry brushed on this vintage beauty to provide that unmistakable Perfect Pearls sparkle.
Inspiration came in the form of paint and texture for Tracy this week in her pearlized Christmas arch.
I really wanted to try a different colour palette this week for my Christmas creation and that colour came in the form of Claudine Hellmuth's Studio acrylic paint in modern red, perfect for a traditional Christmas piece, toning down the vibrancy a little with snow cap Paint Dabber. No Christmas creation would be complete without a touch of pearl which I have added using Liquid Pearls white opal through a Dylusions Let It Snow stencil. Add into the mix some Melissa Frances cream pearls and my arch is pearlized to perfection!
Pearls make Ashli think of all things fancy and precious. Scrapping a layout about her oldest daughter is just perfect for such an occasion!
When I think of pearls, I think of special occasions, precious moments, and all things fancy. Since today is my oldest daughter's birthday, I figured this was the perfect time to scrap a layout all about how amazing and precious she truly is! I started with a plain kraft page and using lots of spritz, stencils, inks and Perfect Pearls, I was able to achieve a fun and playful background. I then hand cut some Crate Paper into strips to layer up around my photos. A few little pinked circles punched out and layered up with pop dots gave me the perfect spot for the Jenni Bowlin Pearl Stick Pins. A final touch of Hero Arts Pearls complete this special page about my precious girl.
Trace is so addicted to her Perfect Pearls spritzing. She loves to spray it on almost everything!
This beautiful stamp is called Flower Dot Pattern and it is from Hero Arts. When I am going to colour in an image, I always emboss my stamped images with Hero Arts white embossing powder, it makes colouring easier and helps you stay in the lines. My most favorite way to use my Perfect Pearls powder is to mix it with water in a Ranger Mini Mister. It works exceptionally well on projects coloured with Tim Holtz Distress Markers...or any of the Distress line of products. Just spray and watch the magic happen.
Anna-Karin made a little autumn accordion fold book:
My project is not what you would normally think about when hearing the word ‘pearl’. I wanted to use some bottles of Ranger’s Liquid Pearls, which I hadn’t opened yet. They had autumn colours and were perfect together with the Stamper’s Anonymous Tim Holtz Autumn Blueprint stamps. I wanted to really showcase the stamps in a little booklet. The stamping was done with Archival Jet Black, after masking the leaves the background was watercoloured with Distress Stains and the leaves were painted with Liquid Pearls. There are more leaves, stamping and pearls on the cover.
Suzz decided to uses pearls and pearl spray to shimmer and glamour up a card.
I am always looking for birthday cards and wanted a special one for my younger sister. She loves her garden and will appreciate all the flowers and pearls. I used the Hero Arts Fabulous Flourish and Big clock to set the backdrop for my Artistic Outpost Birds. The Prima Flowers and Clock accents add texture around my birds.
Terry loves pearls and loves her Mom dearly, so she decided to make a pearly wrapped present for her Mom's 70th Birthday.
I made a little envelope with a corrugated heart for my Mom's 70th birthday but since this is such a special age I thought to myself that a little envelope was nearly not enough to give as a present to my Mom. So I altered a box and decided to use the fabulous Papers from Graphic45 and worked with lots of pearls and lace. I colored the lace with Rusty Hinge to give it a orange look and on top I placed the butterflies from The Tim and this Gorgeous Rose. To finish my Mom's present I placed pearls on top of the box and Spinners.
Sarah decided to create a dimensional tag and thought shades of blue would be the perfect contrast to her bright flower.
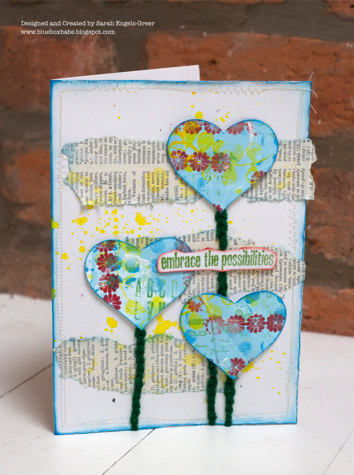
Sometimes you need a bit of ink and a really uplifting motivational sentiment to start your day and where better to look than amongst my Wendy Vecchi stamp collection! I also wanted to show how even just one Art Part, this flower, can add a wonderful dimensional focal point to a piece. I love this background bubble stamp and of course a whisper of Blue Patina Perfect Pearls gives that touch of shimmer. I felt my it needed a bit of extra body so a second layered tag did the trick.
Sugar-crazed spectres will soon be tapping on Dan's door and he's been getting prepared by making these ghoulish candy cartons.
Trick or Treat isn't a tradition we have here in the UK, but year on year the knocks on my door on Halloween have started to increase so I thought I'd make these mini milk cartons to hold candy to give out to any spooky visitors who come-a-calling. Perfect Pearls Pewter provided a haunting dose of ghostly shimmer, both on the spiders webs and as a general highlight in several areas. I dipped into several stamp sets here, including Haunted Mansion, Creative Muse, Retro Halloween, Mini Halloween and Odds and Ends.
I encourage you to check out each of the design team member's blogs for more photos, supply lists, and more. Simply click on their name (above the photo of their project) to visit their blog.
 Now that we've shared the team creations - we're ready to see yours! As always, Simon Says Stamp is giving away a $50 gift voucher that will go to a random entry chosen by Random Generator. The challenge will close at 11:59pm Eastern time on Sunday, November 4th and the winner will be announced during the following week. To qualify all you need to do is create a new project that ties in (in any way!) with our theme and post it, along with a link back to this challenge, and add a link here.
For the full rules, read the "challenge rules" posted in the side-bar here on our blog.
We can't wait to see what you make!


