Hello to you all ...Another week ... Another Theme ... Thank you so much to everyone that played along with our last challenge ... The winners will be announced on Wednesday .... so don't forget to check back ... it could be you! This week Simon Says Stamp and Show ... Your Distress Inks! If you want to join in the fun this week ... all you need to do is ... make something using Distress Inks... pop it on your blog ... and come back here and link up so everyone can see what you made! The challenge will close next Sunday at Midnight ... and to start those inky fingers... take a look at what the Design Team has made this week ...
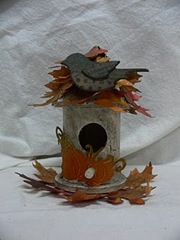
Lori chose to "autumnize" a wooden bird house with leaves cut using the
Tattered Leaves die. The leaves were subjected to a mixture of
distress inks, then some were overstamped with the
Falling Leaves stamp set. She also used a chipboard die cut from the
Caged Bird die, and pumpkins from the
Pumpkin Patch Texture Fade to complete the "autumnization".
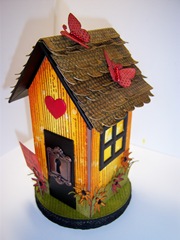
This week my project is a
Maya Road Chipboard House which I have decorated using only white card;
Grungepaper ... The
Wendy Vecchi stamps and of course ...
Distress Inks! I made my own stand for the house with a few pieces of corrugated card ... I have just got to decide what I am going to put inside now!
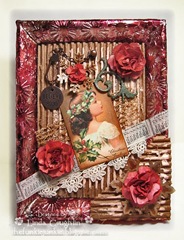
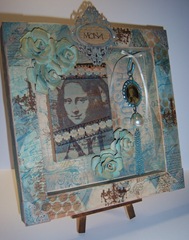
Linda's project this week is an altered picture frame. She used
Fired Brick with a touch of
Vintage Photo distress inks to saturate the paper for her handmade flowers which were cut with the Tim Holtz Tattered Florals die.
Pine Needles DI was used for the
Grungeboard flourish. The corrugated cardboard was misted with Vintage Photo and
Heirloom Gold Perfect Pearls and the snowflakes were sponged with Vintage Photo DI then dabbed with
Antique Linen Distress Stickles. Other Tim Holtz products used were
Tissue Tape, a
Hitch Fastener and a
Swivel Clasp.
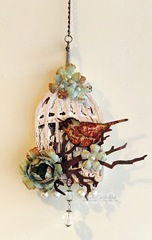
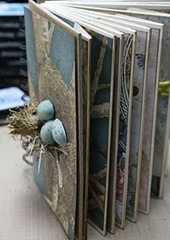
Kim most definitely uses Distress Inks in every project! It is the base colour under the crackle effect on her little dimensional bird cage box. It is with a touch of
Vintage Photo distress ink that enhances the edges of her die cut bird, cut using the new
curio BasicGrey papers, her handmade flowers were cut with the Tim Holtz Tattered Florals die then sprayed with some
Distress Ink Glimmer Mist. The handmade gem in the centre of the flower was created using her
melting pot and
UTEE powders. The branch is cut from Tim Holtz Branch die and the cage is secured at the top with a
Idea-ology swivel clasp. She finished off with
baubles secured with
jump rings.
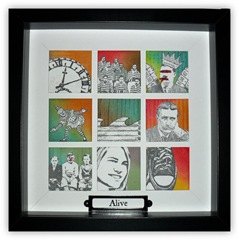
Dan was inspired in this challenge by a song he has listened to a lot lately. For details of what each tile represents,
visit his blog! Out of all of his crafty stash, Distress Inks are probably Dan's "desert island" craft product. Items used here include a
Memento Tuxedo Black ink pad,
distress ink pads and
Tim Holtz stamps.
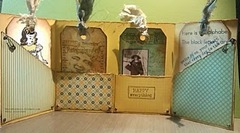
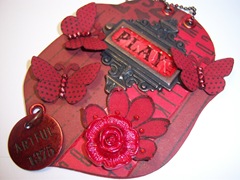
Nancy doesn't think any paper project is complete if it's not distressed & this birthday "gated tag" is no exception. Her go-to
Vintage Photo DI was used on every piece of cardstock, patterned paper & tag used, with touches of Wild Honey & Walnut Stain. The tag in the yellow pocket was coloured with Tumbled Glass, then over-inked with (again!) Vintage Photo. The tag on the right has a phrase stamped with
Faded Jeans, then highlighted with clear embossing powder.
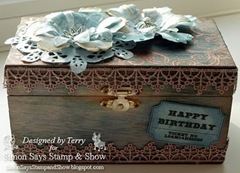
Terry's project this week is an altered tea box, the box was coloured with
Broken China,
Faded Jeans,
Tumbled Glass,
Weathered Wood and
Vintage Photo. The top of the box was worked on with
embossing powder to create the swirls. The flowers are from
The Tim Holtz Tattered Florals Die. She also used the distress inks to work on the flowers and on the edges of the flowers she used
Glossy accents. The pearls,lace and sentiment are from her own stash.The papers that she used for the flowers are from
The Tim Holtz Idea-ology Paper Pack Vintage Shabby and everything is sprayed with
Dazzling Diamonds Glimmermist and
Old Lace from Tattered Angels.
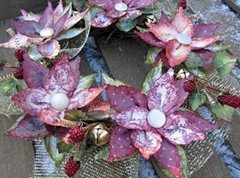
Lynne chose to create a Christmas Wreath using Poinsettias created with the
Tattered Leaves die,
Aged Mahogany and
Forest Moss Distress Ink. She then accented the leaf/petals with Fired Brick and Peeled Paint Distress Stickles. She created a fold in the leaf/petals and stapled with
Tim's Tiny Attacher. Lastly, she adhered the parts together with Claudine Hellmuths
Multi Medium. For a more detailed tutorial check out
her blog.
Nancy W
Nancy says she can't complete a project without using
Distress Ink. One of the first things she inks are the cut edges of the paper, especially the white core of each paper cut. Nancy also always uses
sponge applicators and a
Ranger craft mat, both of which makes inking and distressing a lot easier!
Please do stop by the Design Team's individual blogs for more detailed pictures and further information on their work ... just click on their names.
The Design Team are looking forward to seeing your Inked masterpieces! This week's wonderful prize donated by our wonderful site sponsor
Simon Says Stamp is a $25 gift voucher!
The prize will go to a random entry chosen by Random Generator. The challenge will close at Midnight Eastern time on Sunday 28th November 2010 and the winner will be announced during the following week. To qualify all you need to do is create a new piece of work ... post it on your blog ... with a link to this site and then pop a link below so everyone can come see what you made! And who knows ... if you don't win this prize ... your work may be selected for the much sought after Top Three Blinkie.
Have fun everyone :0)


 .
.

